2. Tutorial
Let’s build on the Quick Start. If you haven’t already, run
through it so that you have a quickstart workspace with one tag (SVC-1).
Further Experiments
Now, let’s try to use Logistic Regression. Create a new Jupyter notebook called
digits-lr in the code subdirectory of quickstart. Enter the following
code into a notebook cell:
from sklearn.linear_model import LogisticRegression
from sklearn.model_selection import GridSearchCV
from sklearn.model_selection import train_test_split
from dataworkspaces.kits.scikit_learn import LineagePredictor, load_dataset_from_resource

# load the data from filesystem into a "Bunch"
dataset = load_dataset_from_resource('sklearn-digits-dataset')

# split the training and test data
X_train, X_test, y_train, y_test = train_test_split(
      dataset.data, dataset.target, test_size=0.5, shuffle=False)

# Run the a grid search to find the best parameters
gs_params={'C':[1e-3, 1e-2, 1e-1, 1, 1e2], 'solver':['lbfgs'],
           'multi_class':['multinomial']}
cv = GridSearchCV(LogisticRegression(), gs_params, cv=5, scoring='accuracy')
cv.fit(X_train, y_train)

# Instantiate a LogisticRegression classifier with the best parameters
# and wrap it for dws
classifier = LineagePredictor(LogisticRegression(**cv.best_params_),
                              'multiclass_classification',
                              input_resource=dataset.resource,
                              model_save_file='digits.joblib')


# train and score the classifier
classifier.fit(X_train, y_train)
classifier.score(X_test, y_test)
There are two differences from our previous notebook:
- we use a LogisticRegression classifier rather than a Support Vector classifier, and
- Before calling our wrapped classifier, we run a grid search to find the best combination of model parameters.
If you run this cell,
you should see several no-convergence warnings (some of the values for C
must be bad for this data set) and then a final accuracy result, around 94%
Ok, so our Logistic Regression
accuracy of 0.94 is not as good as we obtained from the
Support Vector Classifier (0.97). Let’s take a snapshot anyway,
so we have this experiment for future reference. Maybe someone will
ask us, “Did you try Logistic Regession?”, and we can show them
the full results and even use a restore command to re-run the
experiment for them. Here’s how to take the snapshot:
dws snapshot -m "Logistic Regession experiment" LR-1
We can see both snapshots with the command dws report history:
$ dws report history

History of snapshots
| Hash    | Tags  | Created             | accuracy | classification_report     | Message                       |
|_________|_______|_____________________|__________|___________________________|_______________________________|
| bf9fb37 | LR-1  | 2020-01-14T14:27:37 |     0.94 | {'0.0': {'precision': 0.. | Logistic Regession experiment |
| f1401a8 | SVC-1 | 2020-01-14T13:00:39 |    0.969 | {'0.0': {'precision': 1.. | first run with SVC            |
2 snapshots total
Publishing a workspace
Now, we will publish our workspace on GitHub. A similar approach can be taken for other code hosting services like BitBucket or GitLab.
The first few steps are GitHub-specific, but the dws commands will work
across all hosting services.
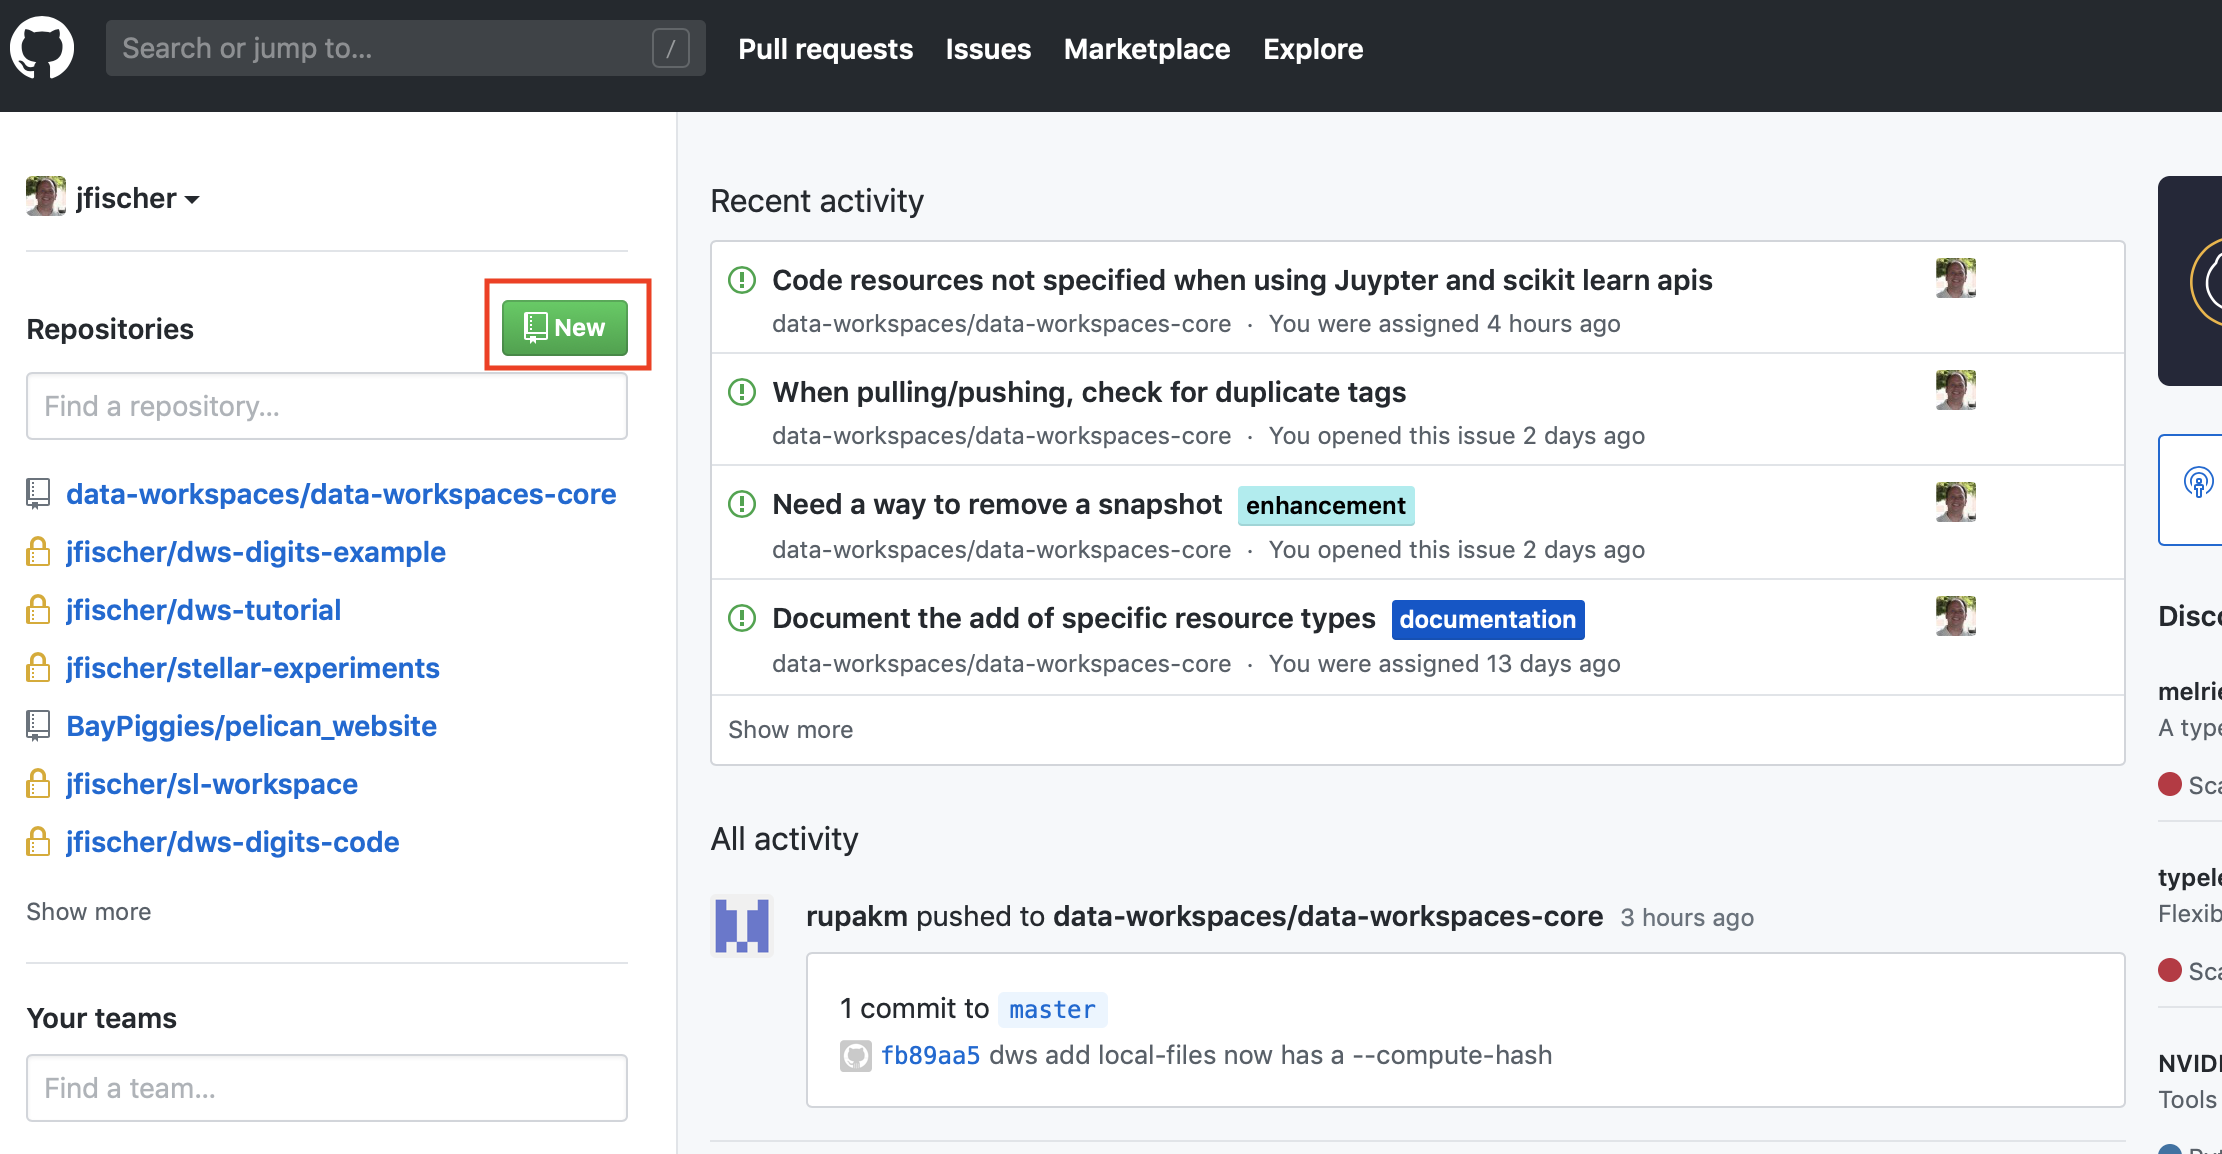
First, create an account on GitHub if you do not already have one. Next, go to your front page on GitHub and click on the green new repository button on the left side of the page:
You should now get a dialog like this:
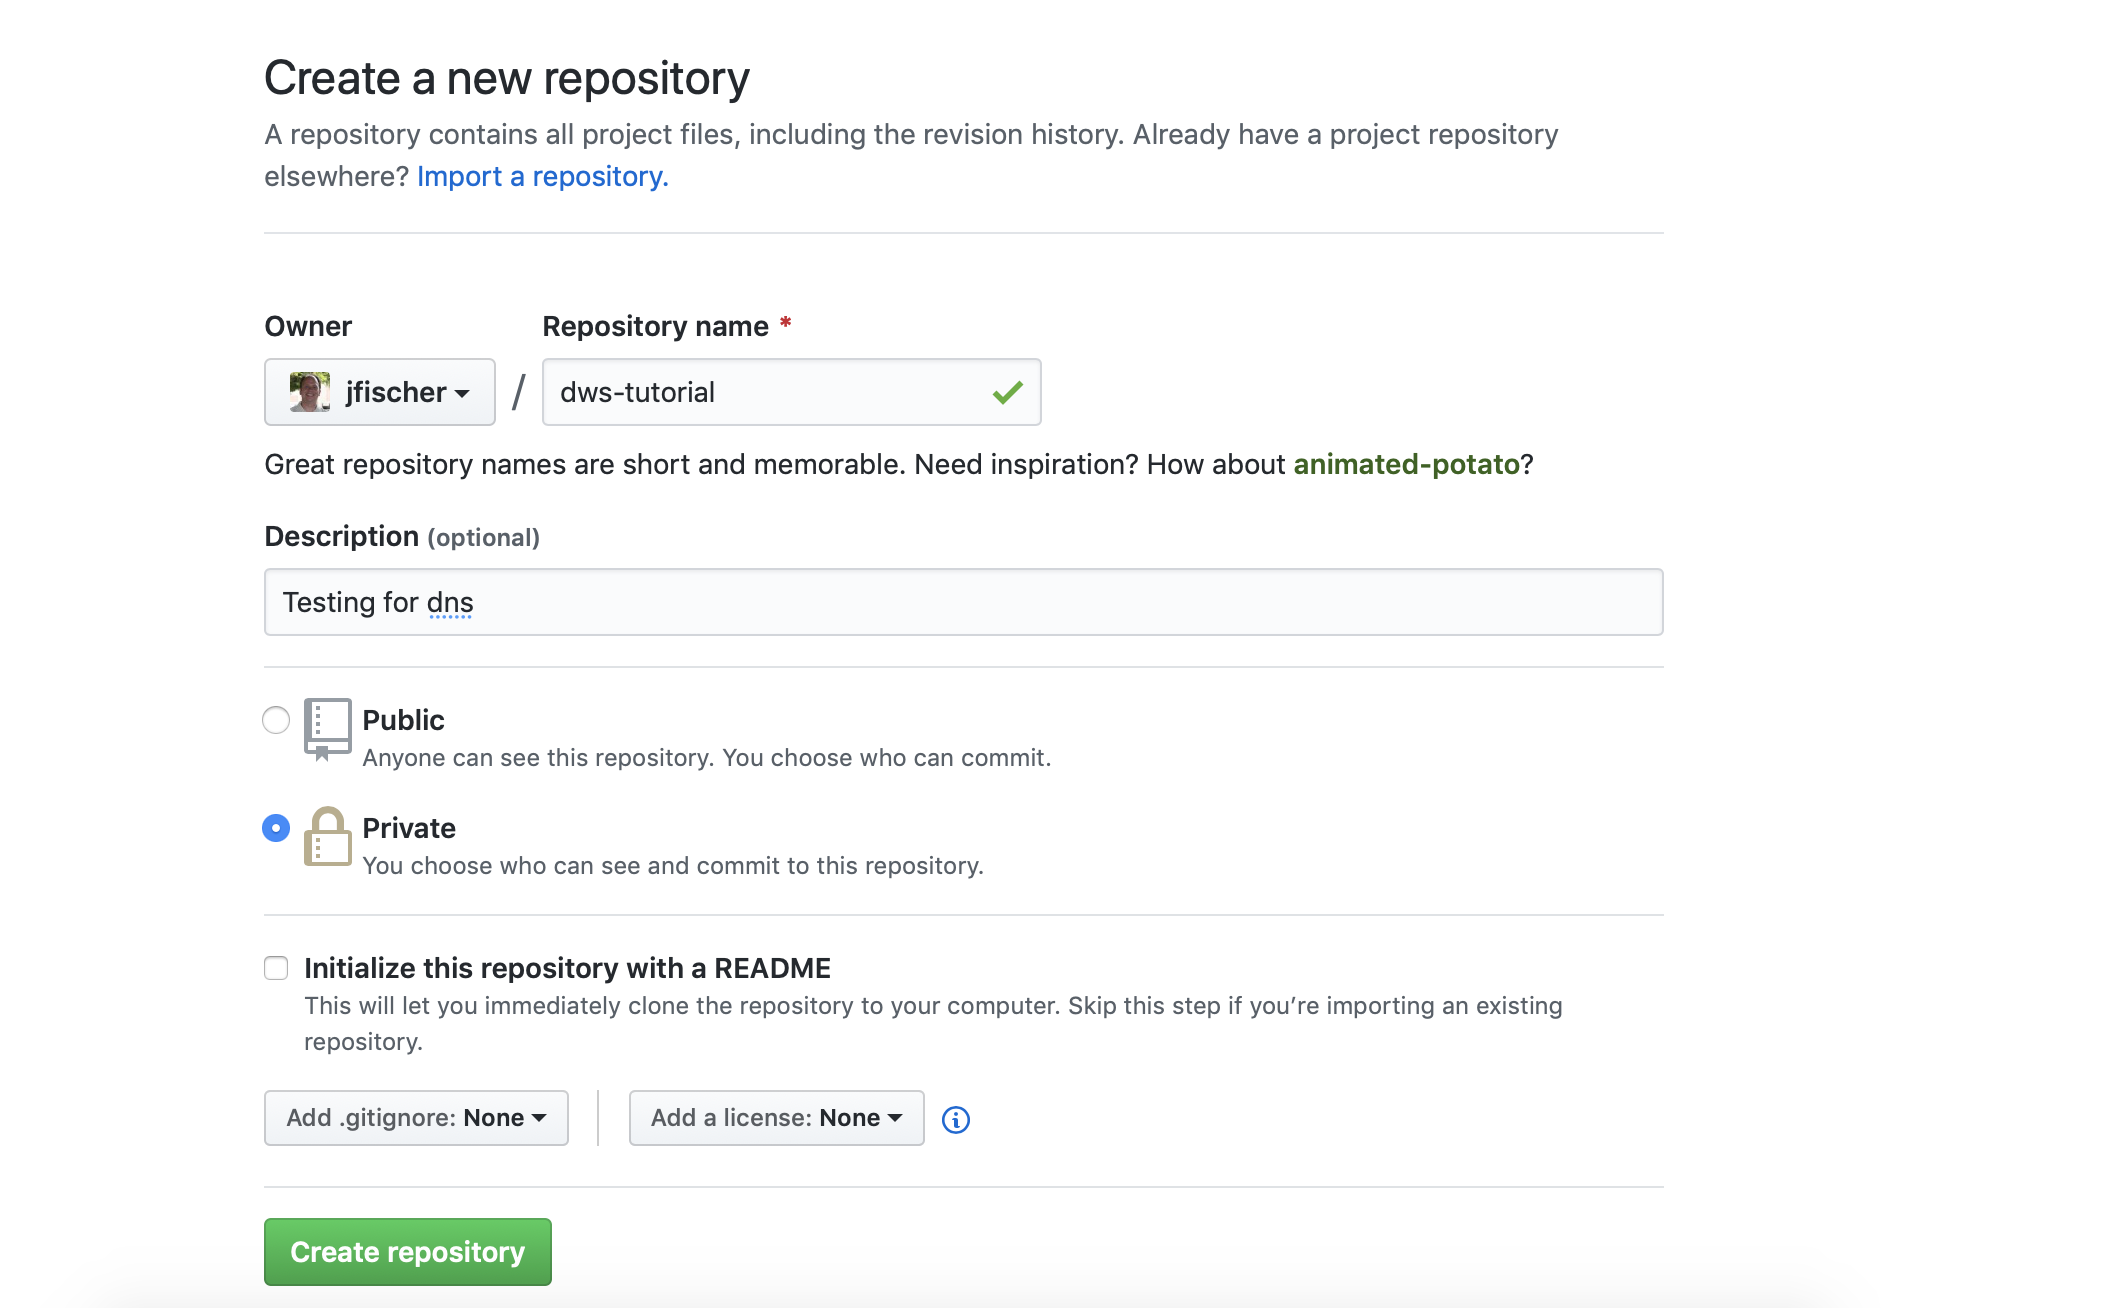
Fill in a name for your repository (in this case, dws-tutorial) and
select whether you want it to be public (visible to the work) or
private (only visible to those you explicitly grant access). You
won’t need a README file, .gitignore, or license file, as we will be
initializing the repository from your local copy. Go ahead and click
on the “Create Repository” button.
Now, back on the command line,
go to the directory containing the quickstart workspace on your
local machine. Run the following command replacing YOUR_USERNAME
with your GitHub username:
dws publish git@github.com:YOUR_USERNAME/dws-tutorial.git
You have published your workspace and its history to a GitHub Repository.
At this point, if you refresh the page for this repository on GitHub, you should see something like this:
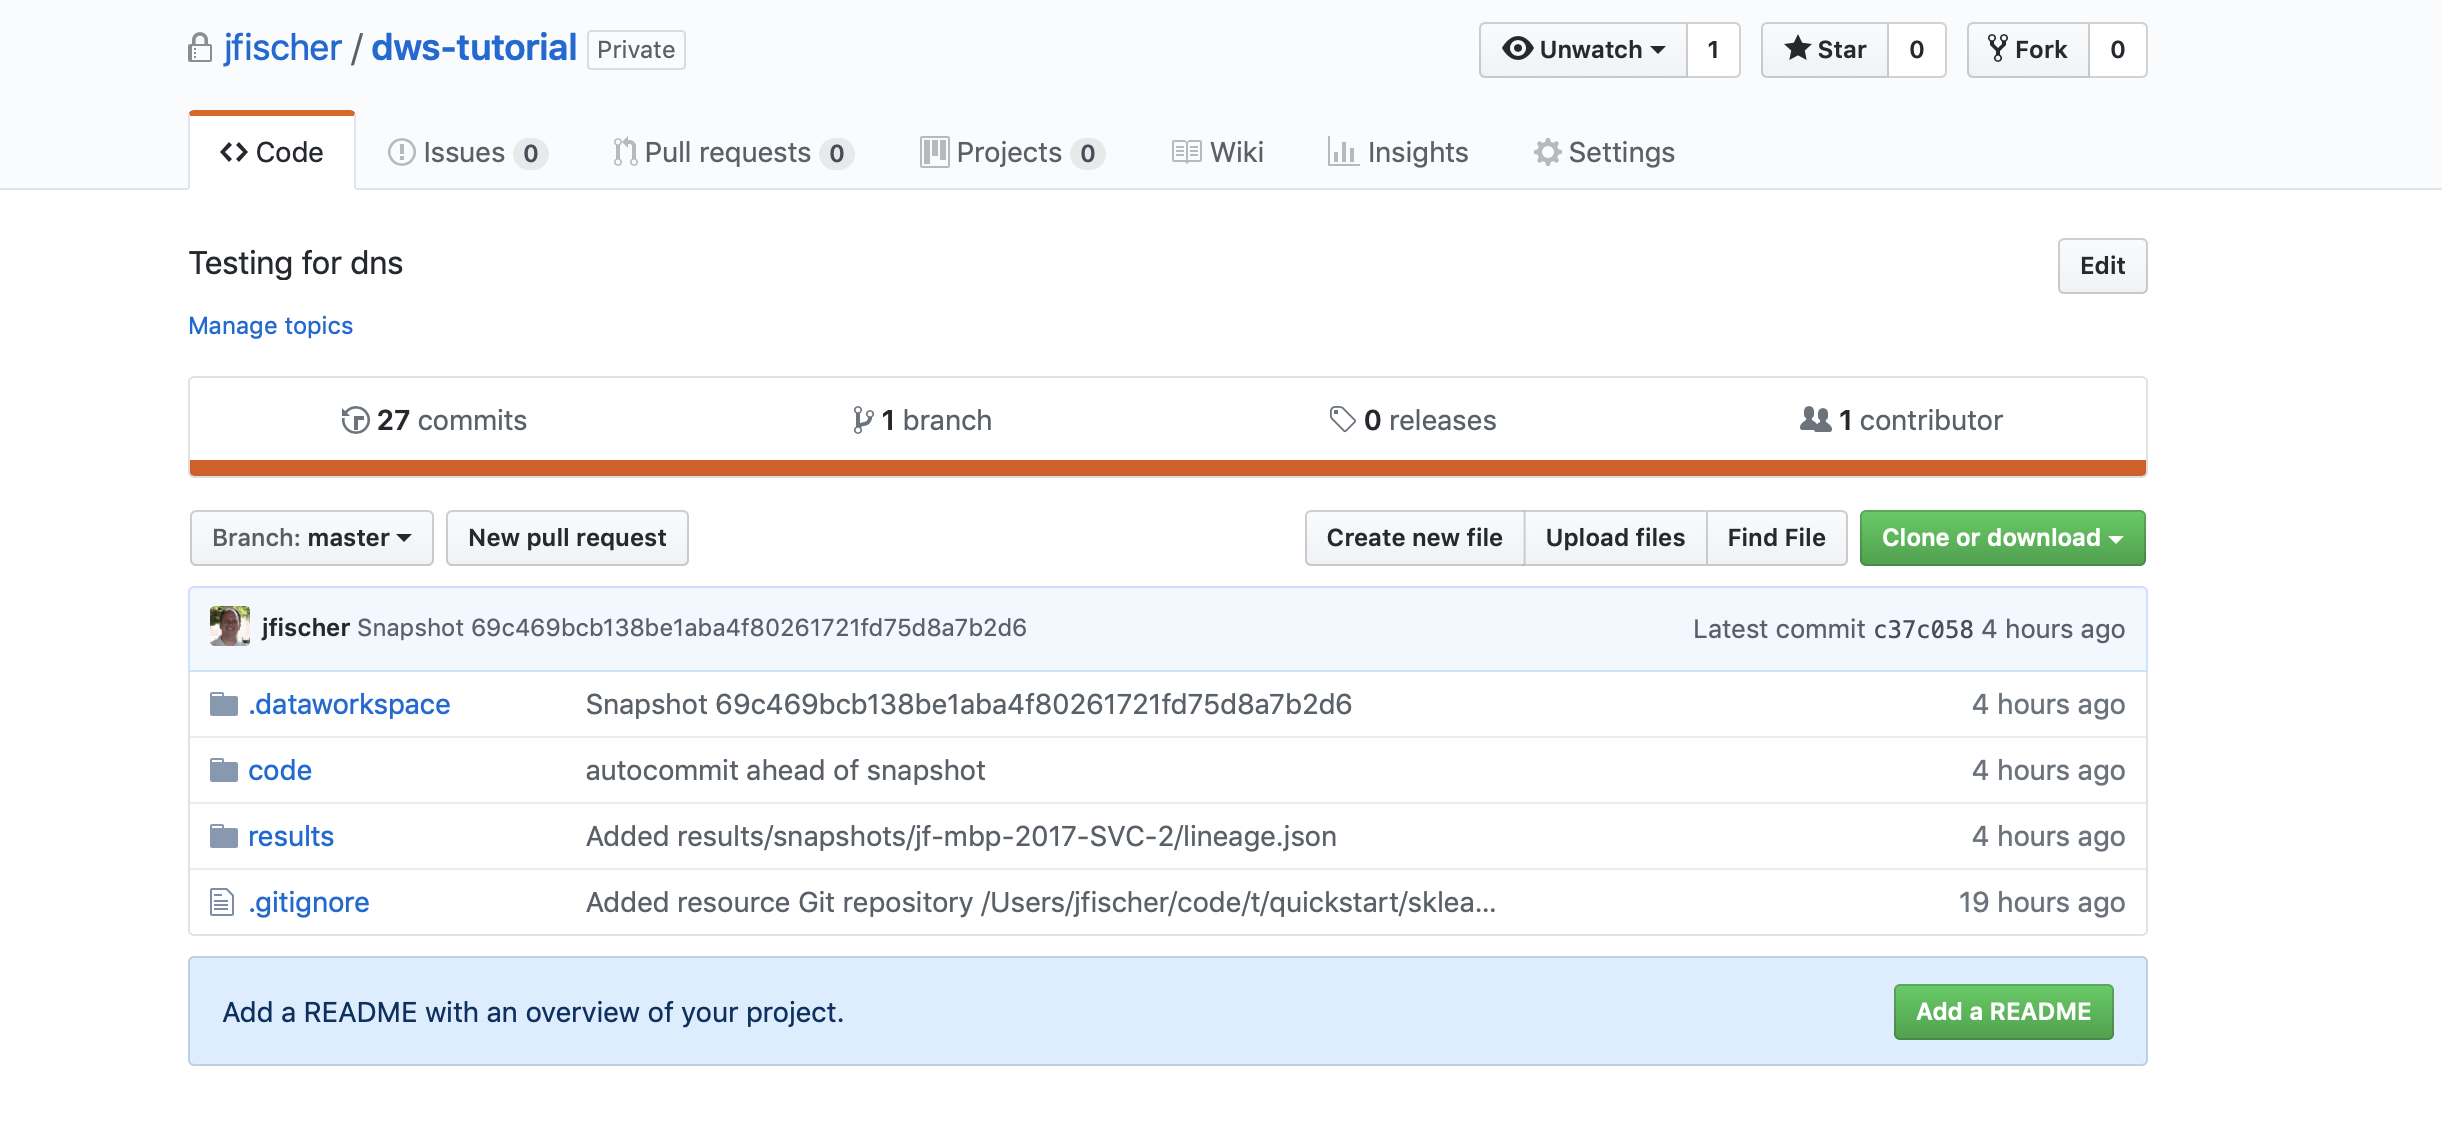
You have successfully published your workspace!
Cloning a workspace
Now, we want to use this workspace on a new machine (perhaps your own or perhaps belonging to a collaborator). First, make certain that the account on the second machine has at least read access to the repository. If you will be pushing updates from this account, it will also need write access to the repo. Next, make sure that your software dependencies are installed (e.g. Jupyter, NumPy, and Scikit-learn) and then install the Data Workspaces library into your local environment:
pip install dataworkspaces
From a browser on your second machine, go back to the GitHub page for your repository and click on the “Clone or download” button. It should show you a URL for cloning via SSH. Click on the clipboard icon to the right of the URL to copy the URL to your machine’s clipboard:
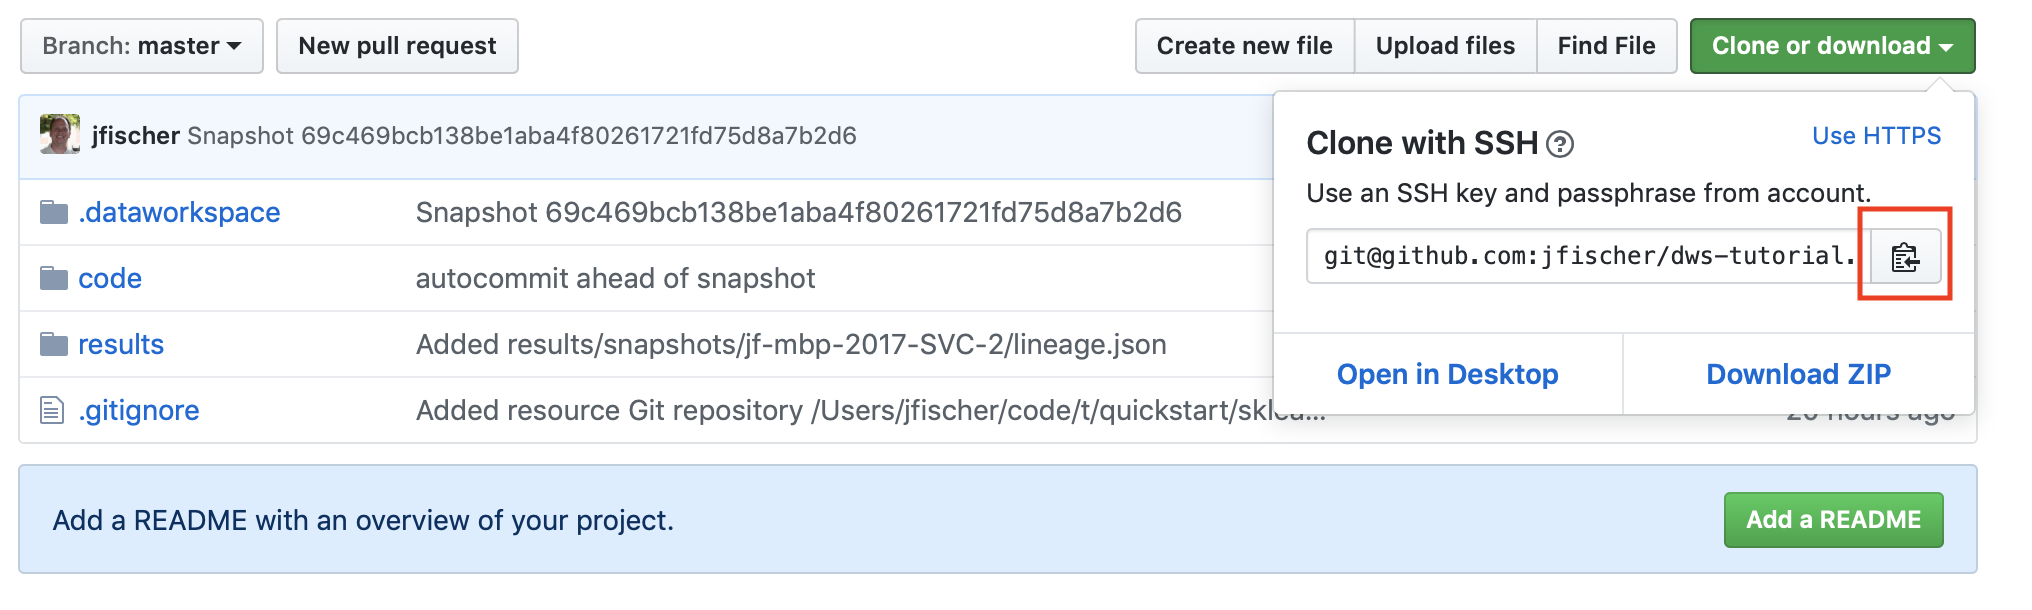
Then, on your second machine, go to the directory you intend to be the parent of th
workspace (in this case ~/workspaces) and run the following:
dws clone GITHUB_CLONE_URL
where GITHUB_CLONE_URL is the URL you copied to your clipboard.
It should ask you for the hostname you want to use to identify this machine. It defaults to the system hostname.
By default, the clone will be in the directory ./quickstart, since
“quickstart” was the name of the original repo. You can change this
by adding the desired local directory name to the command line.
We can now change to the workspace’s directory and run the history command:
$ cd ./quickstart
$ dws report history
History of snapshots
| Hash    | Tags  | Created             | accuracy | classification_report     | Message                       |
|_________|_______|_____________________|__________|___________________________|_______________________________|
| bf9fb37 | LR-1  | 2020-01-14T14:27:37 |     0.94 | {'0.0': {'precision': 0.. | Logistic Regession experiment |
| f1401a8 | SVC-1 | 2020-01-14T13:00:39 |    0.969 | {'0.0': {'precision': 1.. | first run with SVC            |
2 snapshots total
We see the full history from the original workspace!
Sharing updates
Let’s re-run the Support Vector classifier evaluation on the second
machine and see if we reproduce our results. First, go to the code
subdirectory in your workspace. Start the Jupyter notebook as follows:
jupyter notebook digits-svc.ipynb
This should bring up a browser with the notebook. You should see the code from our first experiment. Run the cell. You should get close the same results as on the first machine (0.97 accuracy). Save and shutdown the notebook.
Now, take a snapshot:
dws snapshot -m "reproduce on second machine" SVC-2
We have tagged this snapshot with the tag SVC-2. We want to push the
entire workspace to GitHub. This can be done as follows:
dws push
After the push, the origin respository on GitHub has been updated with
the latest snapshot and results. We can now go back to the origin machine
where we created the workspace, and download the changes. To do so, start
up a command line window, go into the workspace’s directory on the first machine,
and run:
dws pull
After the pull, we should see the experiment we ran on the second machine:
$ dws report history
History of snapshots
| Hash    | Tags  | Created             | accuracy | classification_report     | Message                       |
|_________|_______|_____________________|__________|___________________________|_______________________________|
| 2c195ba | SVC-2 | 2020-01-14T15:20:23 |    0.969 | {'0.0': {'precision': 1.. | reproduce on second machine   |
| bf9fb37 | LR-1  | 2020-01-14T14:27:37 |     0.94 | {'0.0': {'precision': 0.. | Logistic Regession experiment |
| f1401a8 | SVC-1 | 2020-01-14T13:00:39 |    0.969 | {'0.0': {'precision': 1.. | first run with SVC            |
3 snapshots total